
PNG files are known for their crystal-clear quality, especially for logos, graphics, and designs with transparent backgrounds. But there’s a catch — PNGs are often heavier than JPEGs. Uploading uncompressed PNGs can make your website sluggish, increase bounce rates, and hurt your SEO rankings.
The solution? Shrink PNG size without losing quality.
In this blog, we’ll walk you through exactly how to do that, why it matters, and the tools you can use to get the best results.
Why PNG Compression Matters
- Boost Website Speed – Faster-loading pages mean happier users.
- Improve SEO Rankings – Google’s Core Web Vitals reward optimized sites.
- Save Storage Space – Smaller file sizes free up hosting resources.
- Enhance User Experience – Mobile users benefit from lighter images.
👉 If you run a blog, eCommerce store, or portfolio site, shrinking PNGs is a must.
How to Shrink PNG Without Losing Quality (Step-by-Step)
Step 1: Choose the Right Compression Method
There are two types of compression:
- Lossless compression → Keeps original image quality intact while removing unnecessary data (metadata, extra color profiles).
- Lossy compression → Reduces size more aggressively by slightly lowering image details (usually unnoticeable to the human eye).
👉 For professional websites, lossless compression is the safest choice.
Step 2: Select a Reliable Tool
Not all PNG compressors are equal. Some strip quality, while others keep it sharp. The tool we recommend is ShrinkPNGSize.com.
Why?
- 100% free and browser-based
- Supports both lossless and lossy
- No signup or watermark
- Instant download
Step 3: Upload Your PNG File
- Visit ShrinkPNGSize.com.
- Click Upload Image.
- Select the PNG you want to compress.
💡 Tip: For batch uploads, zip multiple PNGs and compress them one by one for faster workflow.
Step 4: Choose Compression Type
- Lossless – Keeps image quality exactly the same.
- Lossy – Reduces file size further with negligible quality drop.
Most websites use a mix: logos & graphics in lossless, product photos in lossy.
Step 5: Download Your Optimized File
- Once compressed, hit Download.
- Replace the heavy PNGs on your website with the optimized ones.
⚡ Result: Your website now loads faster, looks sharp, and ranks better.
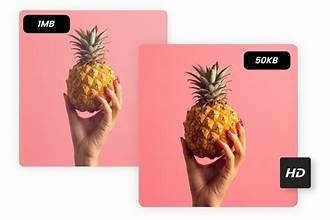
Real Example: Before vs After
| File Type | Original Size | Compressed Size | Quality Change |
|---|---|---|---|
| Logo.png | 1.8 MB | 320 KB | No visible loss |
| Banner.png | 3.2 MB | 780 KB | Slightly lighter |
| Icon.png | 250 KB | 72 KB | No loss |
👉 That’s a 70–85% reduction without hurting the image quality.
FAQs About Shrinking PNGs
Q1: Can I shrink PNG size without losing transparency?
👉 Yes, tools like ShrinkPNGSize keep transparency intact.
Q2: Is online compression safe for sensitive images?
👉 Yes. Reputable tools don’t store your files — they process and delete them instantly.
Q3: Should I use PNG or JPEG for website images?
👉 Use PNG for logos, icons, and transparent images. Use JPEG for photos.
Q4: How much can I reduce PNG file size?
👉 On average, 50–80% depending on the image and method.
Conclusion
Shrinking PNG size doesn’t have to mean sacrificing quality. With the right approach, you can reduce file sizes by up to 80% while keeping your images crisp and professional.
The easiest way? Use ShrinkPNGSize.com — a fast, free, and reliable tool designed for bloggers, designers, and business owners who care about both speed and quality.
👉 Try it now and give your website the performance boost it deserves.